
Japanese Knot Bag Pattern PDF Free: A Comprehensive Guide (Updated 12/12/2025)
Today, December 12th, 2025, discover a world of free Japanese knot bag patterns! These simple, elegant bags offer a zipperless solution,
perfect for crafters seeking a quick and rewarding project. Explore downloadable PDF guides and embrace this timeless, fuss-free design.
What is a Japanese Knot Bag (Furoshiki-Inspired)?
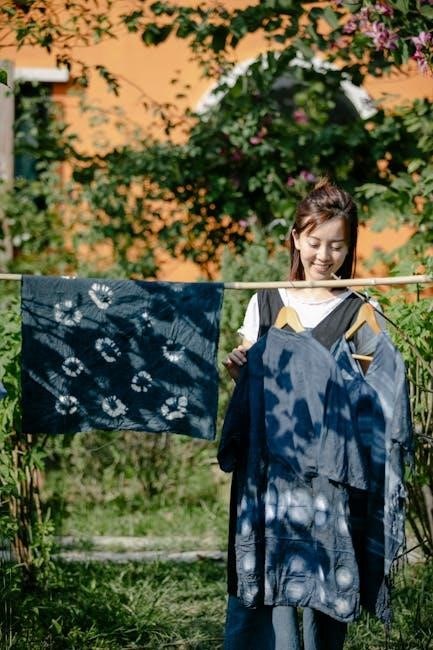
The Japanese knot bag, deeply inspired by the traditional furoshiki wrapping cloths of Japan, is a remarkably versatile and eco-friendly carrying solution. Unlike conventional bags relying on closures like zippers or buttons, it ingeniously secures its contents through a clever knotting technique. This method, rooted in centuries of Japanese tradition, transforms a simple square of fabric into a functional and stylish bag.
Historically, furoshiki were used to transport goods, gifts, and even lunches, showcasing a commitment to reducing waste and embracing reusable materials. The modern Japanese knot bag retains this spirit, offering a sustainable alternative to disposable shopping bags and a charming way to carry everyday essentials.
Essentially, it’s a reversible bag created by folding and tying the corners of a square fabric piece. The resulting handles form when the fabric is knotted, allowing for comfortable carrying. These bags are celebrated for their simplicity, adaptability, and the beautiful aesthetic they bring to any outfit. They are not the most sophisticated, but incredibly practical!
History and Origins of the Japanese Knot Bag
The story of the Japanese knot bag begins with the furoshiki, a traditional Japanese wrapping cloth dating back to the Nara period (710-794 AD). Initially used to protect temple offerings, furoshiki evolved into a practical tool for merchants to safeguard their goods during transport. During the Edo period (1603-1868), its use broadened to include gift-giving and everyday carrying needs amongst all social classes.
These cloths weren’t merely functional; they represented status and artistry, often adorned with family crests or intricate designs. The knotting techniques themselves became refined over generations, each fold and tie carrying symbolic meaning.
The modern Japanese knot bag, as we know it, is a direct descendant of this rich history. While the original furoshiki were often silk, today’s versions utilize a wider range of fabrics. The core principle – a square of fabric transformed into a bag through clever knotting – remains unchanged, honoring a centuries-old tradition of resourcefulness and elegance. It’s a beautiful blend of practicality and cultural heritage.
Why Choose a Japanese Knot Bag? Benefits & Uses
Japanese knot bags offer a compelling alternative to traditional bags, boasting a unique blend of simplicity and functionality. Their primary benefit lies in their zipperless and clasp-free design – a simple knot secures your belongings, eliminating frustrating hardware. This makes them incredibly quick to open and close.
These bags are remarkably versatile. Use them as a reusable shopping bag, a lunch tote, a gym bag for smaller items, or even a stylish everyday carryall. Their compact, foldable nature makes them ideal for travel; easily stashed when not in use.
Beyond practicality, they’re an eco-friendly choice, reducing reliance on plastic bags. The construction is beginner-friendly, making them a great sewing project; Plus, the aesthetic appeal – clean lines and customizable fabrics – adds a touch of Japanese minimalism to your style. They are a sustainable and fashionable option!
Materials Needed for a Basic Japanese Knot Bag
Creating a basic Japanese knot bag requires minimal materials, making it an accessible project for sewists of all levels. The core component is fabric – approximately half a yard (18 inches) of your chosen material is sufficient for a standard-sized bag. Consider cotton, linen, or even lightweight canvas for durability.
You’ll also need matching thread for sewing. A standard sewing machine is highly recommended, though hand-sewing is possible for smaller projects. Scissors or a rotary cutter and cutting mat are essential for precise fabric cutting.
Pins or fabric clips will hold your fabric layers together during sewing. A measuring tape or ruler ensures accurate dimensions. Finally, an iron and ironing board are crucial for pressing seams and achieving a professional finish. These simple supplies unlock a world of creative possibilities!
Fabric Choices: Best Options for Durability & Aesthetics
Selecting the right fabric is key to a beautiful and long-lasting Japanese knot bag. Cotton remains a popular choice, offering affordability, ease of sewing, and a wide range of prints. For increased durability, consider canvas or denim, ideal for heavier items. Linen provides a sophisticated, natural look, though it wrinkles easily.
Quilting cotton is excellent for showcasing vibrant patterns. Japanese cotton, known for its high quality and unique designs, elevates the aesthetic. When choosing, consider the bag’s intended use; heavier fabrics suit robust carrying, while lighter fabrics are perfect for delicate items.
Don’t be afraid to experiment with batik, silk (for a luxurious feel), or even repurposed materials! The fabric’s weight impacts how the bag knots and holds its shape. Prioritize fabrics that are tightly woven for increased strength and longevity.
Tools Required: Cutting, Sewing & Finishing
Creating your Japanese knot bag requires a few essential tools. A rotary cutter, cutting mat, and quilting ruler ensure precise fabric cuts – crucial for a well-shaped bag. Alternatively, sharp fabric scissors will suffice. For sewing, a sewing machine is highly recommended, though hand-sewing is possible for smaller projects.
Essential supplies include thread matching your fabric, pins to hold layers together, and a seam ripper for inevitable mistakes! A measuring tape is vital for accurate dimensions. Consider iron-on interfacing for added structure, particularly with lighter fabrics.
Finishing touches require fabric glue (optional, for neatening edges), and potentially decorative elements like buttons or embroidery floss. A point turner helps create crisp corners. Investing in quality tools streamlines the process and enhances the final product’s appearance.
Finding Free Japanese Knot Bag Patterns (PDF)
The internet offers a wealth of free Japanese knot bag patterns in PDF format! A simple online search using keywords like “free furoshiki pattern PDF,” “Japanese knot bag tutorial PDF,” or “DIY knot bag pattern” yields numerous results. Many crafting blogs and websites generously share their designs.
Pinterest is a fantastic visual resource, linking to countless free patterns. Ravelry, a community for knitters and crocheters, also features sewing patterns, including knot bags. Don’t overlook YouTube; many creators offer video tutorials with downloadable pattern links in the description.
Websites specializing in free sewing patterns, like AllFreeSewing and Sewing.com, often categorize patterns by project type, making it easy to find knot bag options. Remember to always check the pattern’s licensing terms before use;
Top Websites Offering Free Patterns (2025 Update)
As of December 12th, 2025, several websites consistently provide high-quality, free Japanese knot bag patterns in PDF format. So Sew Easy remains a top choice, offering a variety of beginner-friendly designs with clear instructions. Mood Sewciety, known for its stylish patterns, frequently releases free knot bag tutorials.
Craftsy (now Bluprint) often features free patterns as part of promotional offers, so check their website regularly. AllFreeSewing.com continues to curate a large collection from various blogs, providing a diverse selection. The Spruce Crafts also offers well-tested, free patterns suitable for all skill levels.
Don’t forget to explore independent crafting blogs like Noodlehead and Spoonflower, which occasionally release free patterns. Remember to verify download links and pattern completeness before starting your project. New resources emerge frequently, so continuous searching is recommended!
Evaluating Pattern Quality: What to Look For
When sourcing a free Japanese knot bag pattern in PDF format, assessing its quality is crucial for a successful project. First, check for clear, detailed instructions – ideally with accompanying diagrams or photos. A good pattern will specify fabric requirements, cutting dimensions, and seam allowances precisely.
Look for patterns that include a test square to verify your gauge and ensure accurate sizing. Pay attention to the pattern layout; it should be easy to understand and efficiently utilize fabric. Read user reviews if available, to identify potential errors or ambiguities.
Beware of patterns with blurry images, incomplete instructions, or inconsistent measurements. A well-drafted pattern will also offer guidance on fabric choices and finishing techniques. Prioritize patterns from reputable sources to minimize frustration and maximize your crafting enjoyment. A little scrutiny saves time and materials!
Basic Japanese Knot Bag Construction ⎯ Step-by-Step
Let’s construct a classic Japanese knot bag! Begin by cutting a square of fabric – typically around 22×22 inches, though your PDF pattern will specify. Fold the fabric in half, right sides together, creating a rectangle. Sew along the two shorter edges, leaving a small opening for turning.
Turn the bag right side out and press the seams. Carefully close the opening using a blind stitch. Now, create the handles by making two diagonal folds on each top corner, forming triangular flaps. These flaps will interlock to secure the bag.
To close, lay the bag flat and bring the top corners together, threading one flap through the other. Adjust for desired tightness. This simple knot creates a secure and stylish closure. Practice makes perfect! Explore variations in fabric and embellishments once you master this basic technique.
Cutting the Fabric: Dimensions & Grainlines
Precise fabric cutting is crucial for a successful Japanese knot bag. Most PDF patterns utilize square fabric pieces, commonly ranging from 20 to 28 inches per side, depending on the desired bag size. Always refer to your specific pattern for accurate dimensions!
Pay close attention to the grainline. Cutting with the grain ensures the fabric drapes beautifully and the bag maintains its shape. Align the pattern piece with the lengthwise grain of the fabric – typically indicated on the PDF.
Use a rotary cutter, mat, and ruler for clean, accurate cuts. Double-check measurements before cutting, as even small errors can affect the final product. Consider pre-washing your fabric to prevent shrinkage after construction. A well-cut foundation sets the stage for a beautifully crafted bag!
Sewing the Bag: Seams & Reinforcements

Once your fabric is cut, sewing a Japanese knot bag is remarkably straightforward. A standard PDF pattern typically involves creating a simple tube by folding the fabric right sides together and sewing along three sides. A ¼ inch seam allowance is generally recommended for a neat finish.
Reinforcements are key! Backstitch at the beginning and end of each seam to prevent unraveling. Consider reinforcing the corners where the straps will be formed, as these areas experience the most stress. A second pass with the sewing machine, or a zig-zag stitch, can add extra durability.
Turn the bag right side out and press the seams flat. This creates a clean, professional look. Remember to leave an opening for turning – this will be closed later. Careful stitching and strategic reinforcements ensure a long-lasting, beautiful bag!
Variations on the Basic Pattern
The beauty of the Japanese knot bag, even with a simple PDF pattern, lies in its adaptability. Beyond the classic square, explore rectangular variations for a different aesthetic. Experiment with fabric combinations – contrasting linings add a pop of color and visual interest.
Pattern modifications can include adjusting the strap length for shoulder carry or creating wider straps for added comfort. Some designs incorporate boxed corners for a more structured base, increasing the bag’s capacity.
Further embellishments, easily added after sewing, include decorative stitching along the seams or adding small appliques. Don’t be afraid to personalize your bag! Many free PDF resources offer slight variations, inspiring you to create a truly unique and functional accessory.
Adding Pockets: Interior & Exterior Options
Enhance the functionality of your Japanese knot bag with strategically placed pockets! Many free PDF patterns don’t include them, but they’re easily added. Consider exterior patch pockets for quick access to essentials like your phone or keys. These can be simple squares or rectangles, sewn directly onto the bag’s front or back.
Interior pockets are fantastic for organizing smaller items. Slip pockets, created with a simple folded and stitched fabric piece, are ideal for cards or cash. For more secure storage, consider adding a zippered interior pocket – though this increases the project’s complexity.

When modifying a PDF pattern, ensure pocket placement doesn’t interfere with the bag’s knotting function. Reinforce pocket seams for durability, especially if carrying heavier items. Experiment with different pocket sizes and shapes to customize your bag to your specific needs!
Creating Different Closure Styles (Beyond the Basic Knot)
While the classic Japanese knot bag relies on the inherent tying ability of the fabric straps, you can explore alternative closure styles! Many free PDF patterns focus on the traditional knot, but adding variations elevates the design and security.
Consider incorporating button and loop closures for a more defined fastening. Magnetic snaps offer a sleek, modern alternative, though require more sewing skill. For a rustic touch, try fabric ties or ribbons threaded through eyelets. These additions can be found as modifications to existing PDF patterns online.
Remember to adjust your pattern accordingly when adding closures. Reinforce the fabric around buttonholes or snap placements. Experiment with decorative buttons or unique tie materials to personalize your bag. While deviating from the traditional knot, these additions maintain the bag’s overall aesthetic and functionality.
Advanced Techniques: Quilting & Applique
Elevate your Japanese knot bag beyond basic construction with quilting and applique! While many free PDF patterns showcase simple designs, these techniques add texture, visual interest, and durability. Explore patterns incorporating patchwork quilting for a unique, layered look.
Applique allows for personalized designs – think floral motifs, geometric shapes, or even embroidered initials. PDF resources often include applique templates or instructions for transferring designs. Consider using contrasting fabrics for a bold statement or coordinating colors for a subtle effect.
Quilting adds structure and warmth, ideal for heavier fabrics. Remember to interface your fabric before quilting to prevent stretching. When applying applique, secure edges with a satin stitch or blanket stitch. These advanced techniques transform a simple knot bag into a stunning, handcrafted piece, often showcased in more complex PDF guides.
Pattern Adjustments for Different Sizes
Many free PDF Japanese knot bag patterns offer a single size, but easily adapting them is achievable! Understanding basic pattern scaling is key. To create a larger bag, uniformly increase all dimensions – height, width, and strap length – maintaining the original proportions. Conversely, reduce dimensions for a smaller version.
Consider the fabric weight when adjusting size. Heavier fabrics require larger seam allowances for durability. For significantly different sizes, re-evaluate strap length; a strap too short or long impacts usability. Some PDF patterns include notes on scaling, but often it requires a bit of calculation.
Remember to test your adjustments with a muslin mockup before cutting into your final fabric. This ensures a proper fit and avoids wasted materials. Online communities and forums dedicated to Japanese knot bags often share scaling tips and adjusted PDF versions, offering valuable insights.
Resources for Further Learning & Inspiration
Beyond free PDF patterns, a wealth of resources exists to deepen your Japanese knot bag journey! YouTube channels offer excellent video tutorials, visually demonstrating construction techniques and variations. Search for “furoshiki bag tutorial” or “Japanese knot bag sewing” to find numerous helpful guides.
Pinterest is a treasure trove of inspiration, showcasing diverse fabric choices, embellishments, and finished bag designs. Online sewing communities and Reddit forums (r/sewing, r/furoshiki) provide platforms for sharing tips, asking questions, and discovering new PDF pattern links.
Websites dedicated to Japanese crafts and textiles often feature articles on furoshiki and its modern adaptations. Don’t overlook the power of books! Several publications detail traditional Japanese wrapping techniques, providing a historical context and inspiring creative applications. Explore blogs specializing in zero-waste sewing for eco-friendly fabric choices and sustainable practices when utilizing your free PDF patterns.
Troubleshooting Common Issues & Mistakes
When working with a free PDF Japanese knot bag pattern, encountering challenges is common. A frequent issue is misinterpreting the knotting instructions – practice tying the knot with scrap fabric before applying it to your finished bag. Ensure consistent seam allowances; even slight variations can affect the final shape and closure.
If your bag feels unstable, reinforce stress points like handle attachments with extra stitching. Fabric slippage can occur with certain materials; consider using a walking foot on your sewing machine or interfacing to stabilize the fabric. PDF patterns may sometimes have scaling errors – always print the test square to verify accurate sizing before cutting.
Uneven fabric edges can be corrected with careful ironing and trimming. Remember to backstitch at the beginning and end of each seam for durability. Don’t hesitate to revisit online tutorials or forums if you’re stuck – the sewing community is a valuable resource for resolving issues with your PDF project!
Where to Sell Your Finished Japanese Knot Bags
Having mastered the art of crafting Japanese knot bags from PDF patterns, consider turning your hobby into a small business! Etsy remains a popular platform, offering a dedicated audience for handmade items. Create a visually appealing shop with high-quality photos showcasing your unique designs and variations.
Local craft fairs and markets provide direct interaction with potential customers. Consider offering different sizes and fabric choices to cater to diverse preferences. Social media platforms like Instagram and Facebook are excellent for promoting your bags and building a following.
Don’t underestimate the power of word-of-mouth marketing – encourage satisfied customers to spread the word. You could also explore consignment opportunities with local boutiques. Pricing should reflect the cost of materials, your time, and the uniqueness of your creations. Remember to factor in shipping costs when selling online, and always provide excellent customer service!